Brazilian Carrot Cake Recipe: Bolo de Cenoura with Chocolate

Brazilian Carrot Cake Recipe: Bolo de Cenoura with Chocolate

A proper Brazilian carrot cake recipe is one of those “how is this so simple?” desserts. You blend carrots with oil and eggs, stir in the dry ingredients, bake until golden, then pour a shiny chocolate glaze over the top. That’s it. No shredded carrots, no pineapple, no spices doing the heavy lifting. The payoff is a bright orange cake with a tender crumb, a moist texture that lasts for days, and a chocolate topping that tastes like childhood for a lot of people in Brazil.

I’ve made bolo de cenoura in different pans, ovens, and kitchens, and the biggest surprise is how consistent it can be when you understand the method. Once you get the batter right and learn what the glaze is supposed to look like, this cake becomes a reliable weeknight bake and a party favorite. To get more Brazilian desserts.

This guide walks you through what makes Brazilian carrot cake different, how the blender method works, how to nail a glossy glaze, and how to avoid the most common problems like a dense crumb or cracked glaze. You’ll also get an easy, best-practice recipe you can make with everyday ingredients.

What Is a Brazilian Carrot Cake Recipe?

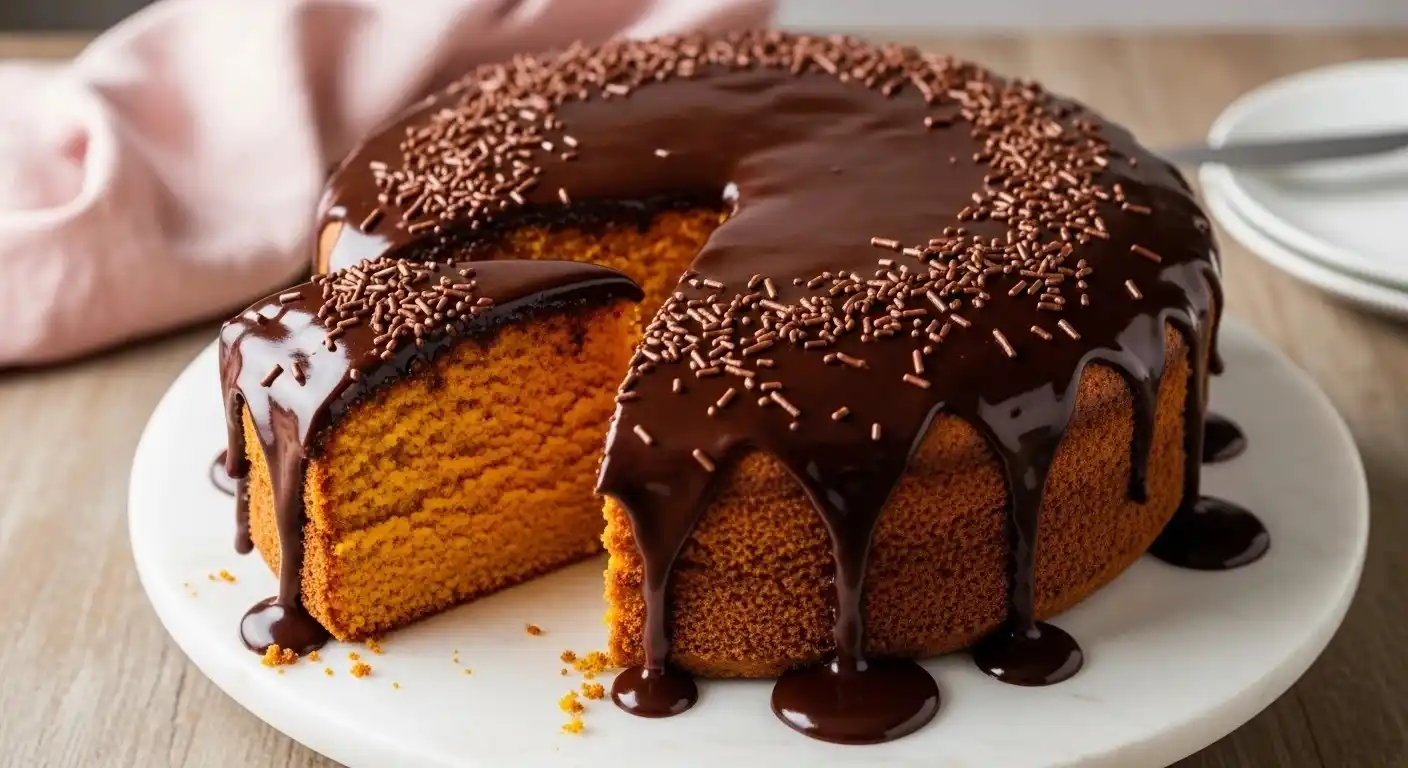
A Brazilian carrot cake recipe is a classic oil-based cake made by blending carrots with vegetable oil and eggs to create a smooth carrot puree, then mixing it with flour, sugar, and baking powder before oven baking. In Portuguese, it’s called bolo de cenoura, and it’s usually finished with a pourable chocolate glaze rather than a thick frosting.

A Brazilian carrot cake recipe creates a moist, tender cake by using a blender to liquefy carrots with oil and eggs, producing a smooth batter that bakes evenly. The signature finish is a cocoa-based chocolate glaze poured over the cake, often served as a sheet cake for easy slicing.

This cake sits in a bigger family of baked goods and homemade cakes, but it’s also a standout inside the holonym of Brazilian culinary tradition, where quick, shareable desserts are part of everyday life and celebrations. It’s common to see it on a Festa Junina dessert table, alongside corn-based sweets and other Brazilian desserts.

You’ll notice regional preferences too. In Rio de Janeiro, the chocolate glaze style tends to be glossy and syrupy, poured generously so it drips and settles into the surface. In São Paulo, you’ll often find modern variations like thicker toppings, layered versions, or brigadeiro-inspired finishes.

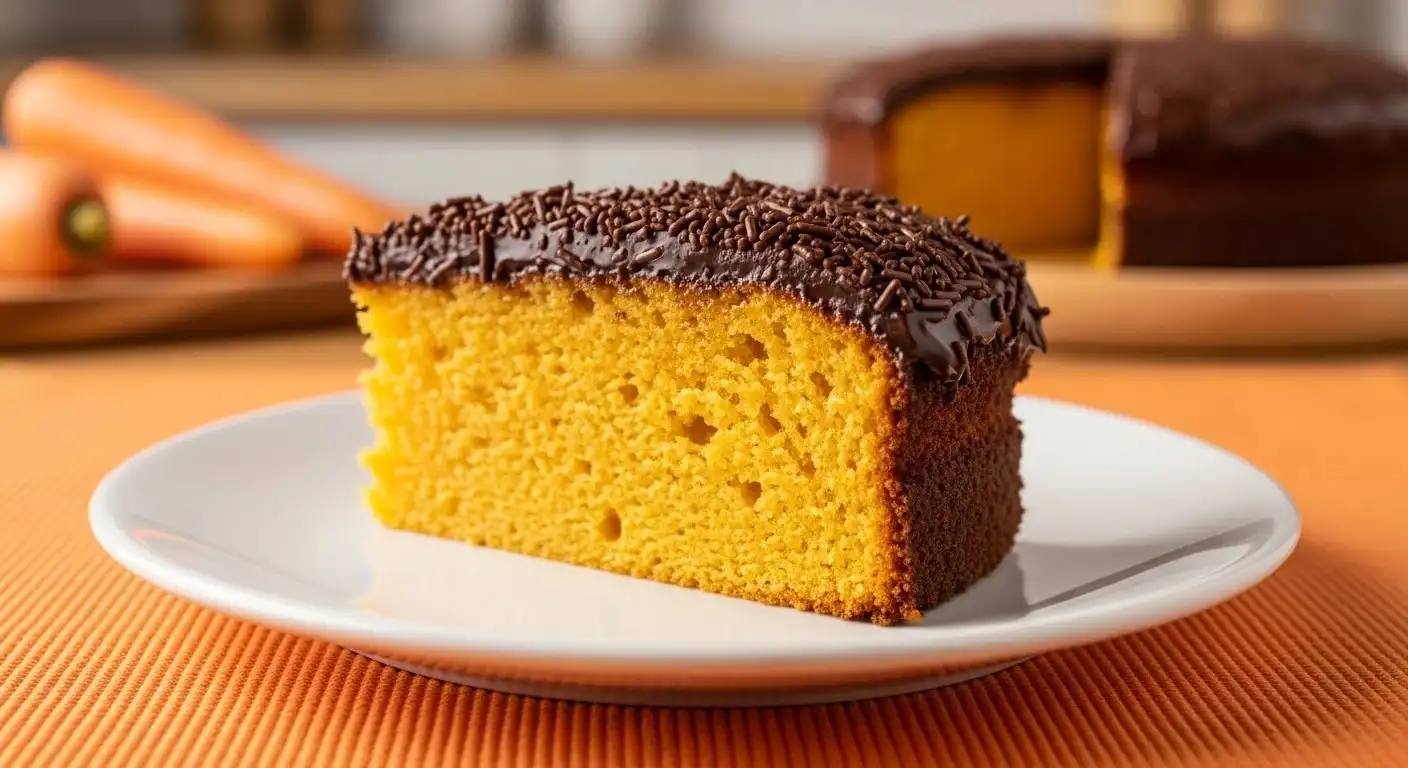
If you are searching for a soft and chocolate topped dessert, this brazilian carrot cake recipe is a classic you should not miss. Unlike traditional carrot cakes, this version is blended until smooth, giving it a light texture and a vibrant color, then finished with a rich chocolate glaze that melts into every slice. It is simple to prepare and perfect for family gatherings or an afternoon treat. If you enjoy creamy and comforting Brazilian sweets, you should also check out Pudim, another beloved dessert known for its smooth texture and caramel flavor.

How is it different from American carrot cake?

The American style is usually built on grated carrots, warm spices, nuts, and a creamy frosting. Brazilian carrot cake is cleaner and brighter. The carrot is the main flavor, and the texture is driven by vegetable oil and proper blending. There’s also a big difference in crumb: Brazilian versions aim for a uniform, fluffy crumb rather than a chunky, textured bite.

How is it different from American carrot cake?

The glaze is part of the identity of bolo de cenoura. It’s not just decoration. It’s a contrast element: slightly bitter cocoa against sweet cake, and a soft set that stays glossy. Some families use condensed milk for a richer topping, and in Brazil that often means Leite Moça, a well-known condensed milk product associated with Nestlé.

How Does a Brazilian Carrot Cake Recipe Work?

A Brazilian carrot cake recipe works because the batter is engineered for moisture and even structure. Instead of adding carrot shreds (which can bake unevenly), you use a blender to create a smooth carrot mixture. This blender method does three things:

  1. Carrot puree integration method: Liquefied carrots disperse evenly, so every bite tastes the same.
  2. Vegetable oil emulsification: Oil coats flour proteins, limiting tough gluten and supporting a tender crumb.
  3. Blender aeration effect: Blending can introduce some air, helping the batter rise when baking powder activates.

The cake’s structure still relies on basics: flour creates the framework, eggs bind and add lift, sugar supports browning and moisture, and baking powder is the leavening engine. When these are balanced, you get a uniform rise instead of a collapsed center, and an evenly baked cake instead of an underbaked center.

Why use a blender instead of grated carrots?

Grated carrots often behave like wet threads. They can sink or clump, creating pockets that bake differently. With the liquefied carrot technique, you get a smooth batter instead of a lumpy batter, which supports uniform crumb matrix formation. It also reduces the risk of coarse carrot pieces that stay firm after baking.

How does oil affect texture?

Oil is the reason this cake stays moist. Butter-based cakes can feel dry by the next day, especially if slightly overbaked. Oil-based crumb hydration holds longer. That’s why carrot oil cake works so well for sheet cake formats and parties where the cake sits out for hours.

Sweetener is not just sweetness

Sugar (or another sweetener) lowers the freezing point. This is why two batches with the same fat can freeze differently if one has less sugar. You’re managing “freezing point depression balance” so the result stays scoopable. Too little sweetener and you get ice crystals. Too much and the texture goes soft and can feel overly sweet and slushy.

Churning changes everything

If you use an ice cream maker, you’ll churn while freezing. That churn cycle does two helpful things:

  1. It keeps the mixture moving so crystals stay small.
  2. It incorporates air (aeration), which improves creaminess.

That’s why churned ice cream often tastes lighter and smoother than no-churn versions. The “air incorporation threshold” is real: too little air can feel dense; too much air can feel fluffy.

If you want a mental model, think of how commercial brands dial this in. A global manufacturer like Nestlé has teams obsessed with texture stability. A plant-based brand like So Delicious does the same work for coconut-based bases, using stabilizers and process control to keep pints creamy in home freezers.

Ingredients That Matter Most (And Why)

This isn’t a long ingredient list, but every piece has a job.

  • Carrots: Provide moisture, color, and mild sweetness. Fresh carrots matter more than you’d think. Old carrots can be woody, which can affect flavor and the smoothness of the batter.
  • Vegetable oil: This is your moisture insurance. It’s the difference between moist texture and dry texture.
  • Eggs: Binding and aeration. Cold eggs can cause the mixture to seize or separate slightly; room temperature eggs blend more smoothly.
  • Sugar: More than sweetness. Sugar helps with browning and moisture retention ratio.
  • Flour: The cake’s structural framework ingredient.
  • Baking powder: Leavening system. If it’s old, you’ll get dense crumb instead of fluffy crumb.

A quick note on standards: flour and sugar labeling is shaped by international guidance from bodies like the Codex Alimentarius Commission, and in Brazil, food rules and safety oversight involve agencies like ANVISA. You don’t need to think about regulation when baking at home, but it explains why certain pantry ingredients are standardized in ways that make recipes more predictable.

Best Easy Brazilian Carrot Cake Recipe (Bolo de Cenoura)
Recipe

Best Easy Brazilian Carrot Cake Recipe (Bolo de Cenoura)

This is the “make it on a Tuesday and it still feels special” version. It’s a Brazilian carrot sheet cake baked in a rectangular pan, which makes glazing and slicing easy.

Ingredients

For the cake batter

  • 3 medium carrots (about 250–300g), peeled and chopped
  • 3 large eggs (room temperature)
  • 1 cup (240 ml) vegetable oil
  • 1 ½ cups (300g) sugar
  • 2 cups (250g) all-purpose flour
  • 1 tablespoon (12–14g) baking powder
  • Pinch of salt (optional, but helps flavor)

For the chocolate glaze

  • 3 tablespoons cocoa powder
  • 1 cup (200g) sugar
  • 2 tablespoons butter (or a spoon of oil for a shinier glaze)
  • ½ cup (120 ml) milk (or water for a lighter glaze)

Equipment

  • Blender (or high-speed blender)
  • Mixing bowl and whisk/spatula
  • Pyrex glass baking pan or a metal sheet pan (9×13-inch is perfect)
  • Cooling rack
  • Small saucepan for glaze
  • Oven

If you have a KitchenAid stand mixer, you can use it for the dry mix step, but you don’t need one. The blender does the heavy work.

Method

  1. Prep the oven and pan
    Preheat to 350°F (175°C). Grease the sheet pan or Pyrex dish. If your pan tends to stick, line with parchment too.
  2. Blend carrots with oil and eggs
    Add carrots, eggs, and vegetable oil to the blender. Blend until completely smooth. You want a bright orange liquid with no carrot specks.
  3. Mix in sugar
    Pour into a bowl. Stir in sugar until evenly combined.
  4. Add the dry ingredients gently
    Sift or sprinkle in flour, baking powder, and a pinch of salt. Mix just until the batter becomes uniform. Stop as soon as you don’t see dry flour. Overmixing is a fast track to a dense crumb.
  5. Bake until golden
    Pour batter into pan. Bake until golden and a toothpick comes out clean, usually 35–45 minutes depending on pan depth and oven behavior. This is where oven temperature consistency matters.
  6. Cool before glazing
    Let the cake sit 10 minutes, then move it to a cooling rack if possible. Cool before glazing if you want the glaze to set glossy instead of soaking in completely.
  7. Make the glaze
    In a saucepan, combine cocoa powder, sugar, butter, and milk. Bring to a gentle simmer, whisking constantly. Simmer 2–4 minutes until it thickens slightly and looks smooth.
  8. Pour chocolate glaze
    Pour the glaze over the cake and spread gently. Let it sit 10–15 minutes to set. Slice and serve.

The Chocolate Glaze Science: How to Get the Perfect Gloss

A great glaze is about timing and texture.

  • Cocoa glaze viscosity balance: The glaze should pour, not plop. If it runs like water, simmer a bit longer. If it turns into thick frosting, add a splash of milk and warm it gently.
  • Glaze setting temperature window: Pouring on a warm cake helps it cling and settle. Pouring on a very hot cake can make it disappear into the crumb. Pouring on a cold cake can make it set too fast and crack.
  • Chocolate gloss stabilization: A small amount of fat (butter or a bit of oil) helps keep the glaze shiny.

If you want a richer “party” glaze, you can replace some milk with condensed milk. In Brazil, many bakers reach for Leite Moça, a condensed milk product strongly associated with Nestlé, especially in sweet toppings and brigadeiro-style variations. This turns the topping into something closer to chocolate frosting, but still pourable when warm.

One more practical detail that’s often missed: balanced sweetness calibration. If your family prefers less sweet desserts, reduce sugar slightly in the glaze first, not in the cake. The cake’s sugar supports structure and moisture; the glaze is where sweetness can be adjusted with less risk.

Variations That Actually Work

Because the batter is smooth and oil-based, it adapts well. Here are reliable options:

  • Traditional bolo de cenoura (classic sheet cake): The everyday version, baked in a rectangular pan and glazed.
  • Carrot bundt cake Brazilian style: Bakes beautifully, but grease the pan aggressively. The glaze can be poured over the top like a waterfall.
  • Carrot cupcakes with chocolate glaze: Great for parties. Reduce bake time to 18–22 minutes.
  • Carrot cake with brigadeiro topping: Replace glaze with a thicker brigadeiro-like topping for a richer finish.
  • Mini bolo de cenoura squares: Bake thin in a larger sheet pan, cut small squares for snack trays.

You can also find vegan Brazilian carrot cake and gluten-free Brazilian carrot cake versions, but those need careful formula changes because eggs and wheat flour strongly influence rise and crumb. If you’re experimenting, focus first on a successful classic.

Pan Choice and Heat Distribution (Why Your Cake Bakes Unevenly)

Most recipes talk about ingredients, but they skip the practical reality of home ovens: pans and heat zones.

Sheet pan heat distribution changes everything. A thin metal pan heats quickly and can brown the edges faster, which is great for a slightly caramelized crust but risky if your oven runs hot. A glass dish like Pyrex heats more slowly and retains heat, which can help the center bake more evenly but may require a few extra minutes.

Here’s how to use that knowledge:

  • If your cake is evenly baked on top but has an underbaked center, your pan may be too deep or your oven may run cool. Give it more time, and consider lowering the rack slightly.
  • If your edges go dark while the middle is still wet, your heat is too aggressive. Reduce oven temperature by 10–15°C (or 25°F) next time, or use a thicker pan.
  • If your rise looks great, then the center sinks (collapsed center), you likely opened the oven too early or your baking powder is weak. Uniform rise depends on steady heat.

This is also where the “cake” gets fun: you’re baking a cake, not letting batter “cake” onto the sides of the pan. Grease thoroughly, and don’t let flour paste build up on corners, especially if you reuse pans often.

This bigger-picture thinking is how home baking practice turns into consistent results, not just lucky bakes.

Practical Tips You Can Use Immediately

  • Blend completely, then stop. Smooth batter is the goal, but blending forever can warm the mixture and slightly dull flavor.
  • Use room temperature eggs. Cold eggs can lead to uneven mixing and less lift.
  • Measure flour correctly. Too much flour is a common cause of dry texture.
  • Test baking powder. If it’s been open for months, replace it. Leavening is what keeps this fluffy.
  • Cool before glazing. If you want a shiny top that sets, cool 15–20 minutes before you pour.

Common Mistakes and How to Fix Them

1) Dense crumb instead of fluffy crumb
Usually caused by old baking powder, overmixing once flour is added, or insufficient blending (coarse carrot pieces). Mix gently and check your leavening.

2) Dry texture instead of moist texture
Often from overbaking or too much flour. Bake until just done and measure carefully.

3) Underbaked center
Can happen if the oven temperature is low or the pan is very deep. Extend baking time and verify your oven.

4) Cracked glaze instead of glossy glaze
Typically from overheating the glaze or pouring it when it’s too thick and cooling too quickly. Keep heat gentle and adjust with milk if needed.

Frequently Asked Questions About Brazilian Carrot Cake Recipe

Brazilian carrot cake lasts 2–3 days at room temperature when you store it in airtight storage. Because it’s an oil-based cake, it stays moist longer than butter cakes. If your kitchen is very warm, refrigerate it and bring slices back to room temperature for the best crumb.

Yes, you can freeze bolo de cenoura. Wrap the cake tightly and freeze for up to 2 months. For best results, freeze without glaze and make fresh chocolate glaze after thawing. That keeps the topping glossy instead of grainy.

Blending carrots in a Brazilian carrot cake recipe creates a smooth batter and even moisture, which helps the cake bake uniformly. Grated carrots can create uneven pockets and a lumpy batter. The blender method gives a tender crumb and consistent carrot flavor.

You can use butter, but it changes the result. Vegetable oil is what gives this cake its moisture retention. Butter can make the cake feel richer but slightly drier the next day. If you want the classic moist Brazilian carrot cake, stick with oil.

A sheet pan heats quickly and can brown faster, while a Pyrex glass dish heats slowly and holds heat longer. If your oven runs hot, glass can protect against over-browning. If your oven runs cool, metal can help you get an evenly baked cake sooner.

The Brazilian-style chocolate glaze is usually thinner and pourable, more like chocolate syrup topping than a thick frosting. Cocoa powder and sugar are the base, and some families add condensed milk like Leite Moça for a richer finish that’s popular at celebrations.

Brazilian carrot cake includes carrots, but it’s still a dessert with sugar and oil. It can fit into a balanced diet as a treat. If you want a lighter version, adjust the portion size, or try small squares and keep the glaze thin.

Yes. Bake the cake a day ahead, wrap it well, and glaze it a few hours before serving. This works especially well for Festa Junina-style gatherings where you’re serving a crowd and want easy slicing.

Conclusion

Once you understand the blender method, a Brazilian carrot cake recipe becomes one of the most dependable cakes you can bake. Smooth carrot batter, vegetable oil for moisture, baking powder for lift, and a chocolate glaze that sets glossy instead of cracking. It’s simple, but it’s not careless. The details are what turn it from “fine” into the kind of cake people ask you to make again.

If you try it, start with the classic bolo de cenoura sheet cake, then experiment with Bundt shapes or cupcakes once you know your oven and pan behavior. Bake it for a casual afternoon coffee, or make it the centerpiece of a celebration table. Either way, it delivers.

Share this post:
Santos Camila​

Santos Camila​

Through Brazil Eats, I share authentic Brazilian recipes inspired by family traditions and everyday cooking.

Leave a Reply

Your email address will not be published. Required fields are marked *